Recipes

We have to eat

Pumpkin Cheesecake

I really wish I could take credit for this recipe. I’ve been making it for so many years that it feels like mine. I mean when you’ve had something be a part of your holiday traditions longer than your children, that’s got to be something. And as often as I like to put my own twist on things, this recipe remains untouched – because it’s perfect every time, just the way it is. It’s creamy and luscious and sweet and seasonal with the pumpkin… so without further ado: From Better Homes and Gardens’ Test Kitchen Favorites:

As organic as possible: (ok, there’s my twist)

1 1/2 cups graham cracker crumbs (about 20 squares)

1/3 cup sugar

3 Tbsp butter, melter

2 – 8 oz packages cream cheese, softened

1 cup half-and-half or light cream

1 cup canned pumpkin

3/4 cup sugar

3 Tbsp all-purpose flour

1 1/2 tsp vanilla

1 tsp cinnamon

1/2 tsp ground ginger

1/2 tsp ground nutmeg

1/4 tsp salt

4 eggs

1 – 8 oz carton dairy sour cream

1/2 tsp vanilla

  1. For crust, combine crumbs, the 1/3 cup sugar, and melter butter. Press onto bottom and about 2 inches up sides of an ungreased 9-inch springform pan. Bake in a 325°F oven for 5 minutes; set aside.
  2. For filling, in a large mixing bowl beat cream cheese, half-and-half, pumpkin, the 3/4 cup sugar, flour, the 1 1/2 teaspoons vanilla, cinnamon, ginger, nutmeg, and salt with an electric mixer until smooth. Add eggs, beating on low speed just until combined.
  3. Spoon filling into crust-lined pan. Place springform pan in a shallow baking pan. Bake in a 325°F oven for 1 hour or until center appears nearly set when gently shaken.
  4. Combine the sour cream, the 2 tablespoons sugar, and the 1/2 teaspoon vanilla; spread over cheesecake. Bake 5 minutes more.
  5. Cool in springform pan on a wire rack for 15 minutes. Loosen crust from sides of pan with a thin-bladed knife or narrow spatula and cool 30 minutes more. Remove sides of pan; cool 1 hour. Cover and chill at least 4 hours up to 24 hours. Makes 16 servings.

To store cheese cake: Cover tightly with plastic wrap. Chill in refrigerator for up to 3 days. Or seal a whole cheesecake or individual pieces in a freezer bag, in an airtight container, or wrapped in heavy foil. Freeze a whole cheesecake for up to a month and pieces for up to 2 weeks. To serve, loosen the covering slightly. Thaw a whole cheesecake in the refrigerator for 24 hours. Thaw individual pieces at room temperature 30 minutes.

You’re welcome! Have a great weekend!

Sweet Potato Muffins

I love the smell of sweet potatoes in the morning. Actually there is something about this time of year that makes me want to bake with them all day long. I am also an advocate of muffins; for breakfast, with lunch, after dinner… Just one of life’s simple pleasures. These are a beautiful orange color and great to serve this time of year with soup or salad. See how coordinated I am?

Makes 18 muffins

As organic as possible:

2 cups Flour

1 tsp Cinnamon

1/2 tsp grated Nutmeg

2 1/2 tsp Baking powder

1 tsp Salt

15 oz canned sweet potatoes (about 2 large, peeled, boiled until tender, and mashed)

2 Eggs, beaten

1/2 cup Sugar

1/4 cup Brown sugar

1/2 cup Milk

1/2 cup Walnut oil

Zest of 1 Orange

1 cup chopped Pecans

Topping:

2 Tbsp sugar

1 tsp cinnamon

Preheat the oven to 400°. Grease or spray a 1 1/2 muffin tins, set aside. In a large bowl, whisk together flour, cinnamon, nutmeg, baking powder, and salt. In a medium sized bowl, add sweet potato, eggs, sugar, brown sugar, oil, milk, and orange zest. Mix. Add wet ingredients to dry and stir until incorporated. Gently fold in pecans. Spoon batter into prepared muffin tins, almost filling the cups. (Should make approximately 18 full sized muffins.) Fill remaining empty cups 3/4 full with water to prevent warping. In a small bowl stir sugar and cinnamon topping mixture and sprinkle on top of muffins. Bake for 20-25 minutes until inserted toothpick comes out clean. Allow to cool slightly before transferring to serving dish. I  use a butter knife in gently assisting the muffins out of the tin. Muffins are moist and flavorful, enjoy!

Smoky Cheese Ball

I don’t want to brag, but I’ve been told I make a pretty good cheese ball. Oh yeah, life of the party – right here. It’s honestly one of the easiest things to do. It’s so much better than store bought and worth the effort. The goal is to taste like cheese and be able to spread on a cracker. Because it’s so simple, using quality ingredients is mandatory; punishable by… a tasteless disaster! (Possibly.) Over the years I’ve made quite a few variations, and this one is a crowd pleaser every time.

As organic as possible:

1/2 cup Butter (1 stick), softened

12 oz Cream Cheese (1 1/2 bars), softened

1 1/2 tsp granulated Garlic

1/2 tsp Salt

1 1/2 tsp Worcestershire sauce

1 1/2 Tbsp Milk

8 oz Smoked Gouda, shredded (can substitute with smoked cheddar)

3/4 cup Pecans

On the day I know I’m going to make a cheese ball, I get out my butter and cream cheese in the morning with my coffee. That way when I feel like getting to it, it’s ready to go. That’s like the extent of the difficulty. When you’re ready to get started I throw everything (except the pecans) in a stand up mixer. Although if you don’t have one, no worries; once everything is soft, it would be easy to mix by hand. Beat until creamy, scraping down the sides.

Now here is the trick for a perfect ball: Line a bowl with two sheets of cling wrap, in a cross pattern, pressing down with extra over the sides. Using a spatula, scoop the cheese into the center of the lined bowl. When all of the cheese is in, wrap the cheese with the plastic until covered and form a ball, pressing the cheese together lightly to rid of cracks and air pockets. Place back into the bowl and put in the refrigerator for at least 4 hours. (You can easily make this a day ahead.)

Before serving (or transporting to a Partay) toast the pecans. I like using the toaster oven for small batches like this, but stove top and conventional oven will work too. Heat in a dry skillet over medium heat (watching and tossing) or at about 350º for 6-7 minutes, just until you start catching the aroma of the nut. I don’t like the nuts over toasted for this. Then chop the nuts into small pieces. Remove the ball from the plastic wrap and roll around in the nuts. pressing nuts onto every open space. Don’t worry if the wrap left not-so-pretty lines, they will be covered with beautiful nut pieces! Place on a serving tray with assortment of crackers and spreading knife. Get ready to live.

Easy Oven-Baked Chicken Parm

Sometimes you get a craving and nothing else but a cheesy, salty, crusted piece of moist chicken will do. (Clearly I’m not a vegetarian.) This chicken is coated with a mix of Parmesan and Asiago, for maximum tantalizing flavor. It’s got a crispy outside and is moist on the inside, and it’s baked not fried. So basically it’s guilt-free. It’s great on it’s own, but I love it with my favorite marinara and pasta to make an easy Italian classic, Chicken Parmesan. Yum!

As organic as possible:

4 Chicken breast cut into strips (2-3 per breast lengthwise)

3/4 cup Mayonnaise (you can substitute with light mayo)

1/4 cup Italian seasoned dry bread crumbs

1/2 tsp Salt

1/4 tsp Black pepper

1/4 cup freshly grated Parmesan, plus more for serving

2-3 Tbsp (rounded) freshly grated Asiago

Preheat oven to 425°. Place mayo in a small bowl, set aside. In a shallow baking dish mix bread crumbs, salt, pepper and cheeses. Dredge each piece of chicken in the mayo, so that it has a nice even coating, removing excess. (You’re going to get your hands messy, but it’s worth it.) Then roll coated chicken around in bread crumb mixture until completely covered. Place covered chicken strips on a baking sheet (or two). Place in oven and bake for 20 minutes, until chicken is cooked through, and crust is browned and crispy.

While chicken is cooking, prepare noodles and warm your favorite marinara sauce for serving. (It hardly gets easier for a weeknight meal than that!) Top with more freshly grated Parmesan… Enjoy!

Easy Peasy Shepherd’s Pie

Shepherd’s Pie is such classic comfort food. It’s hearty, warm and flavorful. On a chilly day it’s like a beacon of cozy. There are many variations, and really you can layer on any vegetables you want. As far as I’m concerned there is really no wrong way… But if you know how to boil potatoes and want it easy, here you go!

As organic as possible:

1 Tbsp olive oil

1 cup onion, diced (1 small onion)

2 lbs ground beef (we like 90/10 lean)

10 crackers, crushed (saltine style or butter)

2 1/2 tsp salt (divided)

1 tsp black pepper (divided)

2-3 Tbsp season salt

2 cans creamed corn

3 lbs potatoes red skin potatoes, washed, halved and quartered to boiling size (2″ or so). If you use another potato, no worries, just peel first.

1 cup heavy cream

1 stick butter (1/2 cup)

1/2 cup milk (give or take)

Preheat the oven to 350°. In a large pot cover potatoes with water and start boiling, cook until fork tender. In the meantime in a large skillet, warm oil on medium heat. When runny and hot add onion and let cook a minute or two. Add beef, 1 tsp salt and 1/2 tsp pepper. (Side note: I’m a big fan of seasoning meat initially as it cooks, and again later… it’s tradition.) Cook until browned, drain and add season salt and crackers, toss around until evenly distributed. Taste for seasoning! It’s got to be good enough to eat on its own, salt and pepper as necessary. Then spoon meat mixture evenly on the bottom of a 13 x 9 casserole dish. Next cover meat mixture with creamed corn. (Another side note: if you are not a fan of creamed corn, don’t worry, it won’t taste like creamed corn.) Set aside.

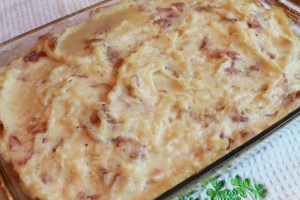
Check potatoes for tenderness and drain when ready. Add butter and cream, mash. Add milk as necessary until desired (slightly spreadable) consistency. Add remaining salt and pepper. Taste! Season as needed to taste delicious on their own. Then layer on top of corn and meat mixture, spread evenly. If you’d like sprinkle lightly with a little of the season salt for color. Bake for 35 minutes, until potatoes just start to brown and dish is heated through. Serve lovingly.

IMG_1353

Mom’s Apple Pie

When I was in Dublin, Ireland there was one place I wanted to go. Ok like two. I wanted to see the world renown Guinness Brewery and Queen of Tarts. When we made it to the latter the line was outside the door. The place was full of satisfied customers and I wanted to be one of them! They sold several different pastries, but like Owen says “You don’t go to a pie shop and order a cake.” So we ordered a berry tart. It was perfect. It had a good flaky crust, an awesome crumble topping and a flawless sweet fruity center. It was love at first bite and immediately I said “this is just like mom’s apple pie.” (Except the obvious fruit difference).

As organic as possible:

5 large or 7 medium Granny Smith apples

1 cup Sugar

1/2 cup Brown sugar

2 tsp Cinnamon

3 Tbsp Flour

1/4 tsp Salt

1 pie crust (I like Martha Stewart paté brisée)

Crumble Topping:

1 cup Sugar

1 cup Flour

1 stick cold salted Butter, cut into cubes

Preheat the oven to 375°. Put the unbaked pie crust in a pie dish and pinch the edges. Set aside. Peel and cut apples into fork full size pieces. Toss apples in sugar and cinnamon and let sit. In the mean time make crumble topping.

To make crumble topping; whisk together sugar and flour, add butter cubes. You must use two butter knives and cross-cut butter into flour/sugar mixture until butter is in pea size pieces. (Do not over cut, because pockets of butter are essential.) Set aside.

Side note: I did not follow the rules this time, and used a pastry cutter, and my pieces were not light and fluffy and my top crumble (pictured) was more of a solid piece and not my mother’s usual look or texture. So don’t be a renegade like me; follow the instructions for a perfect pie.

Back to the pie: Add flour and salt to apple mixture, gently toss. Pour filling into prepared pie dish. Now lovingly spoon crumble topping over apples, making sure all are covered and butter pieces are evenly distributed. Once you run out of visible butter pieces you can leave behind the extra flour (maybe a 1/2 to whole tablespoon full). Bake for 50 minutes to an hour, until golden brown.

Pannu Kakku

I remember the first time I ate this growing up. The name sounded so exotic. My mother had learned the Finnish oven baked pancake recipe from a close family friend. The dish was served warm and topped with syrup. It was sweet and comforting. And although all of the ingredients were familiar to me, the almost soufflé like appearance and custard like texture turned this into something completely different and very special. The ratio of milk to eggs and sugar varies based on personal preference, this is how we like it the most.

As organic as possible:

1 stick Butter

1 cup Flour

4 Eggs

1 cup Milk

1/2 cup Sugar

1 Tbsp Vanilla

Preheat the oven to 400°. Melt the butter in a 13 x 9 inch pan until bubbly and starting to brown. In the mean time, add eggs, milk, vanilla and sugar to flour. Mix until all is incorporated. When butter is ready remove pan from oven and turn down to 375°. Carefully swirl the butter around the pan to cover bottom and sides. Pour batter into the pan and bake 25-30 minutes, until center is set (not runny). Serve warm with syrup or fruit.

GG’s Beef Stew

This is a family heirloom. My mother has memories of her grandma making this stew. She tells me, and now my children, almost every time we eat it, “I used to smell this stew when I would get off the bus. Grandma would have the windows open and I knew… And I would run to the house. We would eat it with buttered bread and a big glass of milk.” So I can think of no better introduction or suggestion. We always make it in big batches, so I tried to break it down into a 1 pot portion. (And therefore can be easily doubled… or quadrupled.) It’s a hearty stew and we have always enjoyed the rustic (large) bites of meat and veggies. I hope you do too!

As organic as possible (my addition)

2 – 2 1/2 lbs chuck roast (stew meat), trimmed and cut into 1″ (or so) cubes

1 1/4 – 1 1/2 lbs Idaho potatoes, peeled and cut into 1 1/2″ (or so) cubes

1 lb carrots, peeled and cut into 1″ (or so) pieces

3-4 celery stalks, cut into about 1″ (or so) pieces

2-3 large onions, peeled and quartered

2 large cans whole stewed tomatoes, halved and quartered in the can with a knife (it’s tradition)

2 Tbsp tomato paste

1 Tbsp salt, to taste

1 tsp black pepper, to taste

2 Tbsp sugar

1 stick butter

Place meat in a pot (dutch oven) with about 1 1/2 quarts of salted and peppered water. Bring to boil and reduce to simmer. Allow to simmer until tender, about 30-45 minutes, depending on cut. Skim off and discard the froth. Throw everything (except sugar and butter) into the pot. Bring to a boil and reduce to a simmer, add butter and sugar. Simmer until veggies are tender, about 45 mins to an hour (if you can wait that long). Salt and pepper to taste.

image

Open your windows to let out the aroma, and serve with buttered white bread and milk- optional, but highly recommended.

Best Oatmeal Cookies Ever?

A life-long friend of mine knows I’m into food blogging. So when she came across a recipe that said it was “The Best Oatmeal Cookie Recipe We’ve Ever Tried,” she passed it along my way. How sweet is that? Thank you Monica! Of course, being a fan of oatmeal raisin cookies, I had to try it. The recipe came from the Wall Street Journal. I don’t know if I’ve ever made a recipe of theirs before. Apparently there is a newly opened restaurant in Manhattan, and rumor has it they have a good cookie!

The first thing I noticed that was the prep; the instructions said to soak the raisins in hot water for 30 minutes. I wondered if that would make the raisins juicy and plump? Not to disappoint, it made a difference! They also mentioned using old fashioned or rolled oats, which I always do, and agree that they are best for oatmeal cookies. The recipe called for adding the egg and vanilla at the end, after adding the oats and raisins; that was another thing I had never done before. Lastly it was recommended to allow the batter to sit for 4 days, which I will admit I did not do, although it gave me a pass. Something I would not do is bake them again for 17 minutes. There was no leeway. The directions specifically said 17 minutes, and that was too long, at least for my pans and oven- unless my goal was awesome granola.

The result was delicious, almost candy like. They kind of had a shiny sweet exterior that I thought was different from my regular batches. The cookies were big and chewy (when cooked about 14-15 minutes). And I have to say my kids loved them. They baked round and flat and firm. To be completely honest I think they are perfect for ice cream sandwiches! And although I am not disappointed, my quest for the perfect oatmeal raisin cookie is still on. Of course I have been heavily persuaded by the organic “Aussie Bites” from Costco. I think they’re on to something! However, my dad disagrees whole-heartedly. This much I know is true: personal taste is subjective. Am I rambling?

As Seen in the Wall Street Journal:

Active Time: 10-15 minutes Total Time: 1 hour, plus 4 days for chilling dough Makes: 14 cookies

1 cup raisins
1¼ cups all-purpose flour
1 tablespoon plus 1 teaspoon ground cinnamon
2 teaspoons baking soda
1½ teaspoons fine sea salt
1½ sticks slightly softened butter
1 cup light brown sugar, firmly packed
6 tablespoons granulated sugar
2 cups old-fashioned or rolled oats
1 extra-large egg
1½ teaspoons vanilla extract

  1. Soak raisins in hot water for 30 minutes, then drain.

  2. Meanwhile, in a small bowl, sift together flour, cinnamon, baking soda and salt.

  3. Using an electric mixer fitted with paddle attachment, cream together butter and sugars on medium speed until light and fluffy, scraping down frequently. Take care not to overbeat.

  4. Add flour mixture to creamed butter and sugar and mix on low speed until combined. Mix in oats, followed by drained raisins, egg and vanilla.

  5. Use a ¼-cup measure to scoop dough onto a parchment-paper lined baking sheet. Flatten each blob with base of measuring cup. Cover baking sheet with plastic wrap and refrigerate 4 days (optional).

  6. To bake cookies: Preheat oven to 350 degrees. Bake until cookies are golden-brown on the outside but still soft in the middle, about 17 minutes. Remove from oven and let rest on baking sheet a few minutes, then transfer to a rack to cool.

—Adapted from Melissa Weller of Sadelle’s, New York City

Thank you Monica! This was a lot of fun!

Sue’s Mexican Chicken

One of the first times I went to eat at my in-laws to-be, Owen requested we eat Mexican Chicken. I love ethnic food fusions, blending two cuisines together. This dish reminds me of a Mexican chicken lasagna. It is loaded with fantastic flavor. I mean really, the depth of flavor is extraordinary. It’s creamy and cheesy; it’s full of veggies and tender pieces of chicken. It’s still one of Owen’s favorites.

As organic as possible:

2 bone-in Chicken breasts

4 large Flour tortillas

2 cans Condensed cream of chicken soup (I like Pacific organic; which actually comes in a cardboard container)

12 oz Cheddar cheese

1 15 oz can Chili (I like Amy’s organic)

1/2 cup Onion, diced

1/2 cup Green pepper, diced

1/2 cup sliced Black olives

1 can diced Tomatoes with chilies

*Divide the ingredients in half

Sour cream for serving (optional)

Boil the chicken until tender, saving the broth. In the mean time preheat the oven to 350º. Spray a 13×9 inch baking dish with non-stick cooking spray (I like organic olive or canola oil), set aside. Shred the chicken into bite size pieces. Briefly dip the tortillas into the broth and line the baking pan, covering the bottom and sides. Begin layering with 1 of the soups, half of the chili, onion, green pepper, olives, chicken, and cheese. Repeat the process again beginning with tortillas, except this time top with tomatoes and green chilis (and a few more olives if you’d like). Bake for 50 to 60 minutes, until bubbly. Allow to cool slightly and set before serving. Serve with a dollop of sour cream.

image

The organic cheddar I used is white, so yours may look a little different depending. Regardless, I just want to grab a spoon and go for it.