chocolate

A Valentine’s Day Gift – Almost Nigella Lawson’s Everyday Brownies

It’s Valentine’s Day! Which is practically synonymous with chocolate and love. And I can’t think of a better way to highlight both than to make a batch of homemade brownies. As Nigella says in her book, “It’s not as if I were short of a brownie recipe or two.” I understand that the brownie (chocolatey, gooey, warm…) is highly subjective to personal taste. But I’m going to come right out and say it: This is the best from scratch brownie I’ve ever had.

Makes 16

1 1/4 sticks (10 Tbsp) unsalted Butter

1 3/4 cups (packed) light Brown Sugar

3/4 cup unsweetened Cocoa powder, sifted

1 cup all-purpose Flour

1 tsp Baking Soda

1/4 tsp Salt

4 Eggs

1 tsp Vanilla extract

Confectioner’s sugar, to dust (optional)

1 x aluminum foil-lined baking pan approx 13x9x2 (I used parchment paper)

Preheat the oven to 375°F. Melt the butter over a gentle heat in a medium-sized saucepan.

When it’s melted, add the sugar, stirring with a wooden spoon (still over a low heat) to help it blend with the melted butter.

Whisk together the cocoa powder, flour, baking soda, and salt, and then stir into the pan; when mixed (this will be a very dry mixture, and not wholly blended at this stage), remove from the heat.

In a bowl or pitcher, whisk the eggs with the vanilla extract and then mix into the brownie mixture in the pan.

Quickly pour and scrape mixture into a foil-lined baking pan or disposable foil pan, spreading the mixture with a spatula, and cook in the preheated oven for approx. 20-25 minutes. It will look set, dark and dry on top, but when you feel the surface, you will sense it is still wibbly underneath and a cake tester will come out gungy. This is desirable.

Transfer the pan to a rack to cool a little before cutting into 16 pieces and dusting with confectioner’s sugar. I love these gorgeously warm. But then again, I love them cold, too. Actually, when cold they are properly speaking more brownie-like; gooily tender within and chewy on top.

I agree with Nigella completely about the texture… mine were perfectly done in 20 minutes. If you’d like, use a heart-shaped cookie cutter before dusting with powdered sugar and serving. Have a great day full of love (and chocolate)!

img_0194

No-Bake Cookies

I know, I know- everyone has a no-bake cookie recipe. But I don’t think I could have a food blog without mentioning my family’s go-to cookie. In fact, this is my second published no-bake cookie recipe. My kids and I make these often, and like to play around with ingredients, chocolates, etc.. But this is the original tried and true recipe. I got it from a book, a gift- from a collection of recipes from the Trinity Wesleyan Church in Jackson, MI… but I know it by heart.

As organic as possible:

1/2 cup (1 stick) Butter (I like salted for this recipe) *And sometimes I add a pinch of salt anyway

2 cups Sugar

1/2 cup Milk

1/2 cup Cocoa Powder

1 tsp Vanilla

1/2 cup Peanut Butter (rounded)

3 cups Oats

In a large heavy bottomed sauce pan, heat butter, sugar, milk, and cocoa powder stirring often. Bring to boil and let it bubble for 2 minutes. Remove from heat and stir in the peanut butter and vanilla. When it’s all melted and mixed well, add the oats and stir until all of them are coated with chocolatey goodness. Use a spoon to drop little mounds onto sheets of waxed paper. Allow to cool and harden slightly before eating.

Happy Eating!

Loving Lately ?

Loving Lately: National Chocolate Fondue Day (February 5)

I feel that it is my patriotic duty to observe as many National Food Holidays as possible… when I remember to check what they are. But National Chocolate Fondue Day is not one that I take lightly. I like to celebrate it often, just in remembrance, because I love chocolate fondue. In fact, even if it were not a holiday, I would celebrate it on many days; as I have for many years, before I knew it was a holiday. And even though we don’t grow the cocoa bean here in the US, we know how to appreciate it, so by jove some thoughtful man or woman took it upon their civil duty to petition to have a National Chocolate Fondue day, and I think we owe it to them to celebrate it… everywhere! Don’t you?

I’m proud to say someone else in my house thinks so too. I found my little patriot, as I often do, celebrating all by himself.

img_6651

An easy recipe for a great chocolate fondue:

6 oz of milk chocolate chips melted with…

1/4 cup chunky (or creamy) peanut butter

Dip fruit, graham crackers, marshmallows or whatever else you’d like!

Is there a National Chocolate & Peanut Butter Day? I’ll check. Because I’d like another reason to celebrate that too.


Chorizo & Thyme’s Quick Chocolate Bundt Cake

I don’t know anyone who doesn’t appreciate chocolate on some level. Some of us appreciate it more than others. I’ve really learned the importance of a good piece of chocolate. If laughter is the best medicine, chocolate has to be the next best thing. My friend Roberta of Chorizo & Thyme has come up with a lovely and quick chocolate cake recipe. It’s just right for a delightful indulgence… with a little more to share.

Now because my friend Roberta lives across the pond on the island of Malta, her measurements are in grams. I felt quite precise getting out my scale (thank you Owen, for my gift several years ago now). I will tell you that preheating the oven to 355° is about right in translation. Because the cake called for natural “yoghurt” I think it’s considered health food, and I really think it helped keep the cake moist. Lastly, the only addition I would make is a pinch of salt, but that’s how I like it. I’ll leave that up to you. Okay, for one more addition, I wish Roberta were here to share a slice over some coffee.

As originally posted at Chorizo & Thyme

For the cake:

250g caster sugar
215g plain flour
2 teaspoons baking powder
85g good quality cocoa powder
60ml vegetable oil
185g natural yoghurt
170ml water
2 large eggs
For the chocolate topping:

100g dark chocolate
small knob of butter
Preheat the oven to 180°C and brush a deep bundt tin or ring tin with melted butter or flavourless oil.

Put all the ingredients for the cake in a food processor or mixer, or in a simple mixing bowl and mix until all the ingredients are just combined.

Pour the cake batter into your greased cake tin and bake for around 35 to 40 minutes or until a skewer inserted somewhere near the middle of the cake comes out clean.

Leave the cake to cool completely on a wire rack. Remove from the tin onto a cake stand or serving plate.

In the meantime melt the chocolate in a bowl over a pan of simmer water, adding a knob of butter for extra shine. When completely melted, remove from the heat and let it cool slightly.

Pour the melted chocolate over the cake and you’re done.

Enjoy!

Thanks again Roberta for sharing this quick cake recipe. We really enjoyed it, and I loved sharing it with my guests!

Crockpot Toffee Nut Clusters

When I think about what I like in a candy, it usually involves chocolate and nuts, chewy and crunchy, sweet and salty. I also really love toffee. Lucky for me there is really not much I don’t like. And even luckier for me, these little clusters of goodness have it all! Recently I shared with you about my cousin Charlotte. Thankfully she shared this recipe with me! It really couldn’t get much easier either. It makes a lot of these chocolatey and nutty packages, so it’s great for giving as gifts or sharing at the office. And not to worry, if there are still leftovers… they freeze well too. Enjoy!

2 small jars (16 oz each) dry roasted peanuts (1 salted, 1 unsalted)

3 lbs or blocks of white almond bark, vanilla Candiquick or vanilla candy coating, chopped into small pieces

1/2 lb Bakers semi-sweet chocolate, chopped into small pieces

1 bag Heath chips

1 bag Milk chocolate chips

1 bag Semi sweet chocolate chips

*Also a full size crockpot, a sturdy spoon and a strong arm 😉

Put everything in the crockpot on low. Stir often. When all is melted and no more dashes of white or dark spots of chocolate can be seen (about an hour), spoon in globs on wax or parchment paper until it hardens (a couple more hours).

image

And you get to feel like a chocolatier, so that’s cool.

It makes a vat full, so be prepared to share or freeze the clusters and bring them out in batches. They will last a few months in the freezer.

Hershey Kisses Peanut Butter Blossoms

Does everyone in the world make these cookies? Well for the one person out there who may not have had them, this recipe is for you. Because something this special deserves to be had by all. And if you haven’t had them, please do yourself this favor. These cookies are the perfect little chewy packages of peanut butter and chocolate. They are like the best little sweet one-bites ever. (Ok, maybe they’re like 2-3 bites.) Now if only Hershey would make organic kisses, what a wonderful world it would be.

Via a Hershey Kisses magazine ad cut out a decade ago:

48 Hershey’s Kisses Milk Chocolates

1/2 cup Shortening

3/4 cup Creamy Peanut Butter

1/3 cup granulated Sugar

1/3 cup packed Light brown sugar

1 egg

2 Tbsp milk

1 tsp vanilla

1 1/2 cups all-purpose flour

1 tsp baking soda

1/2 tsp salt

Granulated Sugar (for rolling)

  1. Heat oven to 375°F. Remove wrappers from chocolates
  2. Beat shortening and peanut butter in large bowl. Add 1/3 cup granulated and brown sugar; beat until fluffy. Add egg, milk and vanilla; beat well. Stir together flour, baking soda and salt; gradually beat into mixture.
  3. Shape dough into 1-inch balls. Roll in sugar; place on engrossed cookie sheet.
  4. Bake 8 to 10 minutes or until lightly browned. Immediately press a Kisses Chocolate into center of each cookie. Rem from cookie sheet to wire rack. Cool completely. Makes about 4 dozen cookies.

I’d like to add that this recipe can be easily doubled, which I do when bring them to a gathering (or up north for a weekend getaway at the cabin)… because they go fast. Everyone from kids to adults love them. I remember my Aunt Lynn making these when I was a kid. They seemed so special, probably because they were enjoyed on a holiday. But don’t wait for a holiday. You should enjoy them today. And every day. And you should share. And then every day will feel like a holiday. And work will be that much better. (Unless someone has a peanut allergy.)

Life Bellissima’s Triple Chocolate Chip Cookies

I am loving my WordPress Cooking Challenge to make recipes of fellow bloggers! (Of course what’s not to love when you’re making chocolate chip cookies?) And I’m almost to the finish line! My seventh selection, out of eight recipes to try, was from Life Bellissima, a beautiful blog about her faith, family, recipes and life on a farm- including chickens (My dream! And, by the way, if she starts roasting coffee and opens a little cafe, I’m moving my family to Idaho!) Anna of Life Bellissima, is also an advocate of organic eating, just another thing we have in common. Sometimes you just have those instant connections, when you know you are kindred spirits (like from Anne of Green Gables). This is one of those times.

Going through this recipe was fun. Firstly, I rarely use almond milk in baking (for no particular reason). But it was fun to feel like I am making a treat with a different kind of nutritional value. It also called for coconut oil, which I have out on the counter top at all times, but I don’t think I’ve put in my cookies before. I love trying new things! However, the best part of this recipe is that there are no eggs, so it’s is nice to have a cookie recipe in case you are out of eggs (which Anna probably isn’t since she has chickens…). But is even better when you can without hesitation tell your assistant, aka your four year old daughter, that yes indeed she can eat taste the batter!

Anna did mention that she had to bake the cookies a little longer than the recipe she adapted these from, and I did too (about 14 mins, as opposed to 11). And even though I let them set for a while, they were still so soft and pliable that some of them could still fold and break… which was AWESOME! They were so soft and chewy! And very chocolate-y. I loved them and so did my my nine year old chocolate officiant. He aptly claimed they taste like “brownie cookies”!

For the original recipe and instructions visit Life Bellissima!

Sweetima’s Chocolate Mousse

One of the best parts about food blogging is you are constantly coming across new blogs with interesting recipes. Sometimes there is an instant connection, something intriguing that makes you want to know more. For me, I was instantly curious about Sweetima’s soft faded pictures of sweet treats. They all look beautiful, fluffy and light… and I’m a sucker for beautiful desserts.

I was always a salty person growing up, I’d take a bag of chips over brownies, ice cream or cake any day of the week. But that all changed during my first pregnancy. In strong waves of desire, I craved chocolate. All of the sudden I understood words like chocoholic. Nothing else but chocolate would do. When the pregnancy was over, my love of chocolate remained. Now I am officially a sweet and salty person.

I was having a strong yearning for chocolate on the day Sweetima posted the recipe for Chocolate Mousse, and I made a comment (and a mental note) to try this recipe. When fellow blogger, Healthy in all Hues, posted a challenge to make other food blogger’s recipes, it was just the incentive I needed!

The recipe was easy enough to follow, but I must admit I had a little complication with the method. I was doing okay until I had to whisk the egg whites over simmering water. In my prior experiences I whisked the egg whites at room temperature… and this time I really had to be careful not to let it scramble! Maybe because it was only one egg white? Probably because I could use more practice!

I also got a little panicked when the recipe said to divide the mousse into two portions. I don’t like to feel like I’m not going to have enough food. (I felt like my three year old getting one scoop of ice cream.) To compensate I made plenty of whipped cream, more than the optional amount suggested. But I assure you, the recipe was right! The mousse was rich, decadent and satisfying, more than I needed to appease my chocolate appetite.

For the original recipe and more sweet treats check out Sweetima!

Double Chocolate-Almond Biscotti

I can eat biscotti all day without guilt. Maybe because its called biscotti (Italian for a twice baked cookie), it doesn’t register. I think I’ve tried it all. There hasn’t been one variation I didn’t like. Besides, that second round in the oven probably got rid of anything bad for me, right?

As organic as possible:

1/2 cup Butter, softened

3/4 cup Sugar (rounded)

1 tsp Almond extract

1/4 cup Cocoa powder

2 tsp Baking powder

1/8 tsp salt

2 Eggs

1 3/4 cup Flour

1/2 cup Milk Chocolate chips or pieces

1 cup Semi-sweet Chocolate chips or pieces

1 cup Sliced, slivered, or chopped almonds

Preheat oven to 375º. Lightly grease a cookie sheet, set aside. In a stand-up electric mixer or in a large mixing bowl with an electric mixer or with your mighty hand, beat butter, sugar and almond extract. Add cocoa powder, baking powder and salt, mix. Scrape down the sides of the bowl and add eggs, one at a time. Add flour, a third at a time, until combined. Remove bowl from mixer. Add milk chocolate, semi-sweet chocolate and almond pieces, gently fold until incorporated.

Separate dough into to halves. Taking one half of the dough portion into your hands, shape into a log about 9″ long. Place onto the baking sheet lengthwise and gently press down to lightly flatten. Repeat with the other half. Place into the oven and bake 20-25 minutes, until a toothpick inserted into the center comes out clean. Remove from oven and let cool for 1 hour.

Preheat the oven to 325º. Place cookie loaf onto a cutting board and cut diagonally with a serrated knife. Place cut side down and bake for 8-9 minutes. Turn the cookies over and bake for an additional 8-9 minutes, until crisp. Let cool. Serve with coffee or hot cocoa for dipping or all alone.

Entertaining the Kids with English Chocolate Crisps

By now we have established that I am a stay at home mom of four. So it fair to presume that most of my entertaining is for my children. Keeping them active in the kitchen is important to me. (Okay, to be completely honest sometimes I want them away from the kitchen). But mostly I want to teach them about food and preparing it. I want them to see ingredients and learn where they come from. I often talk to them about eating organic and try to explain (age appropriate) reasons why. For convenience sake we do buy packaged food (I don’t know the first thing about making chocolate), but we try to make good choices.

472

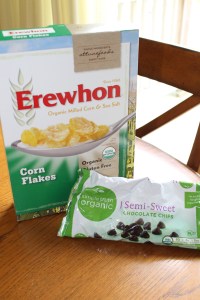
The Barefoot Contessa cookbook, Make It Ahead, has a great recipe to try with your children. There is no baking involved (only melting some chocolate on the stove top, done by mom). There are only for ingredients: milk chocolate, bittersweet chocolate (I used semi-sweet, pictured), cornflakes and cranberries, and the whole process is basically stirring and dropping spoonfuls of the mix onto paper. Perfect for my two and four year old!

475

They like being a part of the creating process and they l-o-v-e taking ownership of the final product! Such an accomplishment! Since there were no eggs involved, eating the batter was an option… and that’s always a good reward along the way.

482

480

483

The result was quality time with mom, happy kids and fun treats to eat. I encourage you to spend some time with the kids in your life, “it’s the best investment you’ll ever make!”

513

It’s also a rule of mine to try a recipe as it is written for the first time, before I tweak it. And these cookies were delicious. But I think next time we will make them a little more kid-friendly and fun (and subsequently less healthy) by substituting the cranberries with mini-marshmallows!